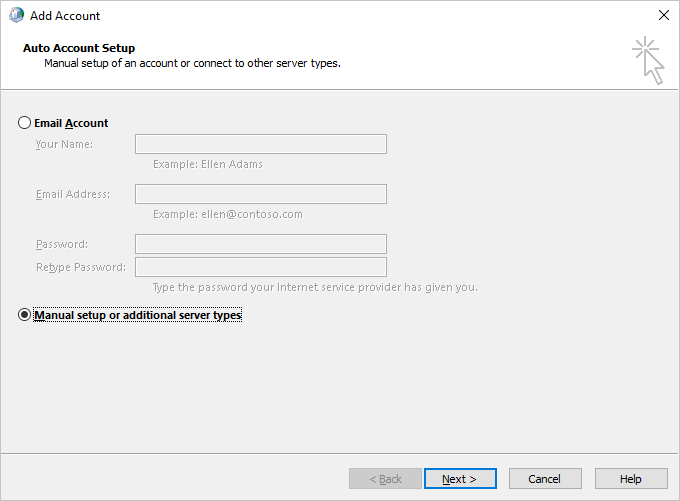
In Outlook, select File > Add Account
Select Manual setup or additional server types, then press Next
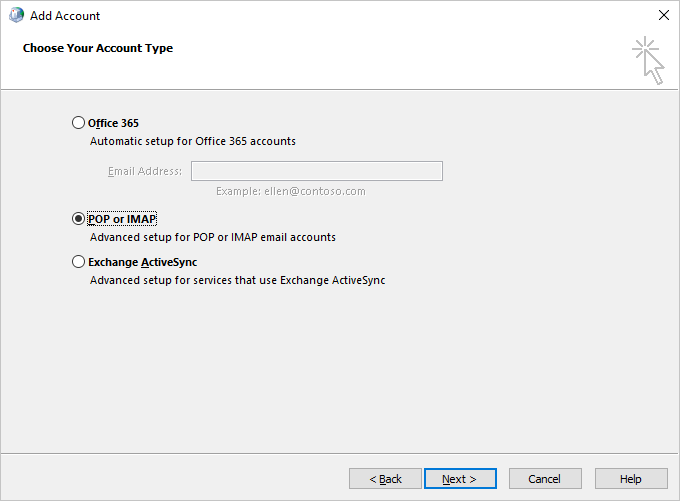
Select POP or IMAP, then press Next
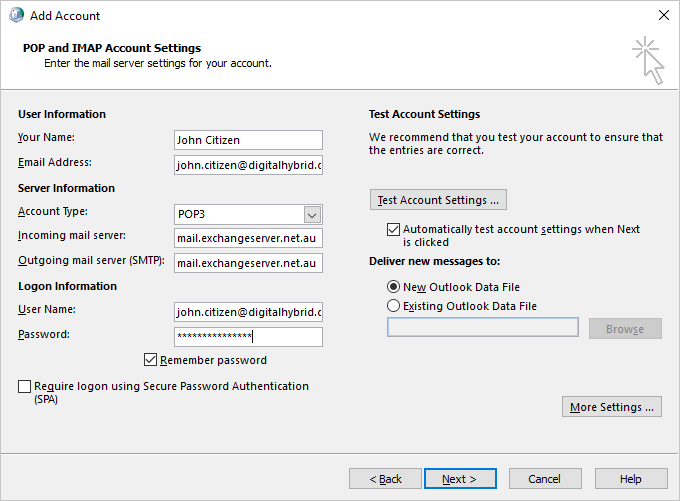
Now fill in your mailbox settings:
Under User Information
Your name: type a name that you want to appear as being displayed
Email address: your Exchange e-mail address
Under Server Information
Account type: Choose POP from the drop-down
Incoming mail server: mail.exchangeserver.net.au
Outgoing mail server: mail.exchangeserver.net.au
Note that after authenticating you may not able to send outbound mail after pressing the Test E-mail Settings button. If that's the case, you may need to use the SMTP server address of your local ISP, eg mail.bigpond.com or mail.optusnet.com.au or mail.internode.on.net etc.
Logon Information
User Name: your Exchange e-mail address
Password: your mailbox password
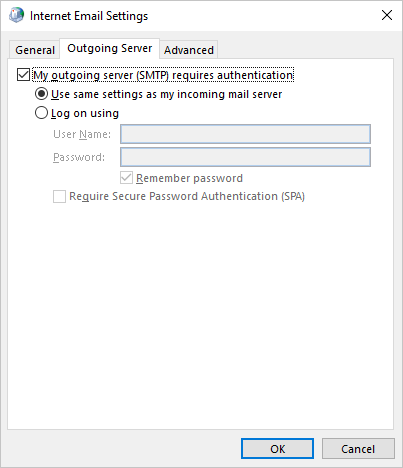
Now click More Settings > Outgoing server, tick My outgoing server (SMTP) requires authentication, then select Use the same settings as my incoming mail server
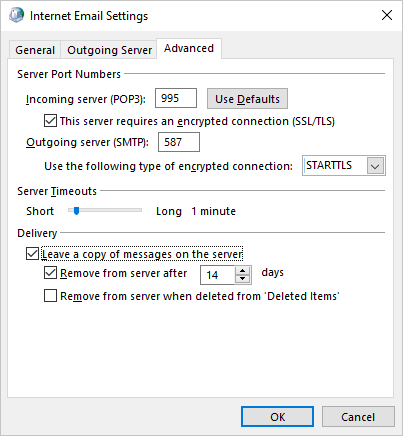
Click the Advanced
tab and adjust the settings to the following:Incoming server (IMAP4): 993
Next to Use the following type of encrypted connection choose SSL from the drop-down
Outgoing server (SMTP): 587
Next to Use the following type of encrypted connection choose TLS from the drop-down
The remaining settings are entirely optional and can be adjusted to suit your needs
Click OK then Test account settings
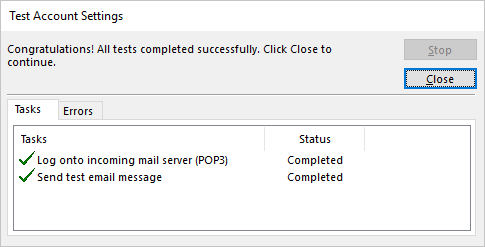
If you receive two green ticks, click Close, Next and Finish


