Bria is an outstanding SIP app for Android, but it does have some inherent weakenesses which can be easily overcome by using this setup guide.
IMPORTANT NOTE:
It's extremely important you follow this guide for optimum settings and performance, as Bria is notoriously slow when registering to SIP servers using its default methods.
When you first start the Bria Android app, you'll notice that it has no SIP accounts enabled.
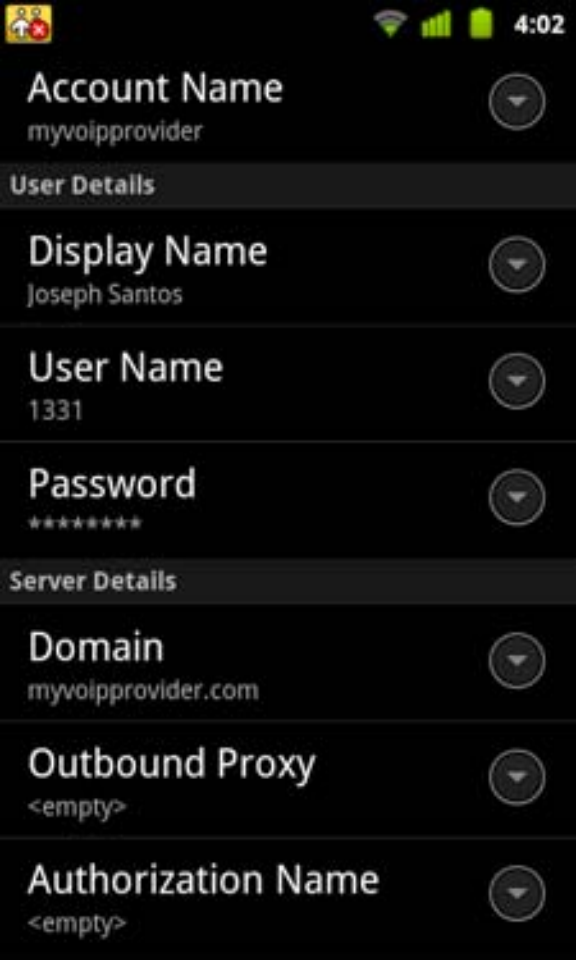
Tap Accounts, and enter the following ...
Account Name: voipserver
Display Name: your name, or whatever you prefer
User Name: your 8-digit extension number, eg, 12340101
Password: your extension password
Domain: sip.voipserver.net.au or pbx.voipserver.net.au
Outbound Proxy: sip.voipserver.net.au:5060 or pbx.voipserver.net.au:5060
Authorization Name: leave blank
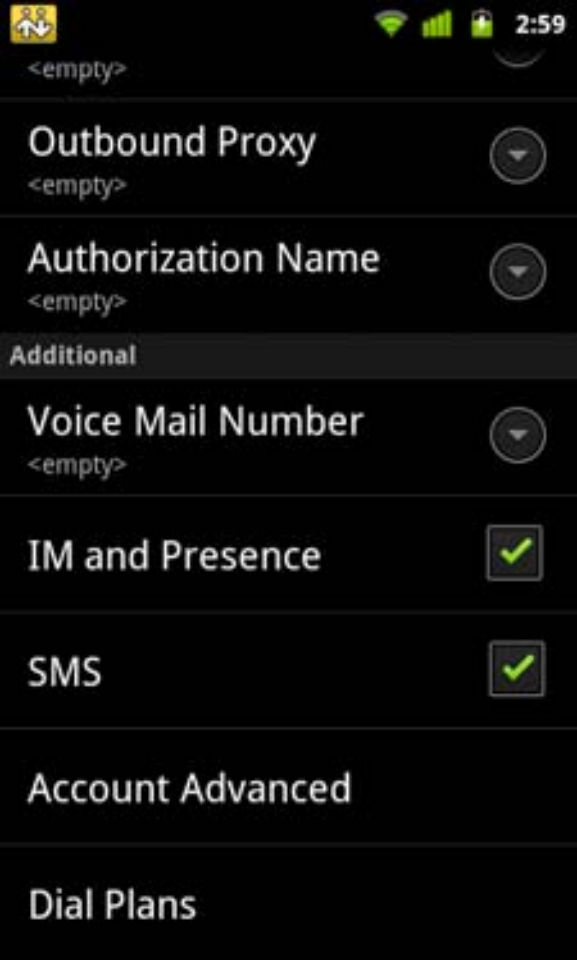
In the Additional section, set the following:
Voice Mail Number: *95
Now tap Advanced
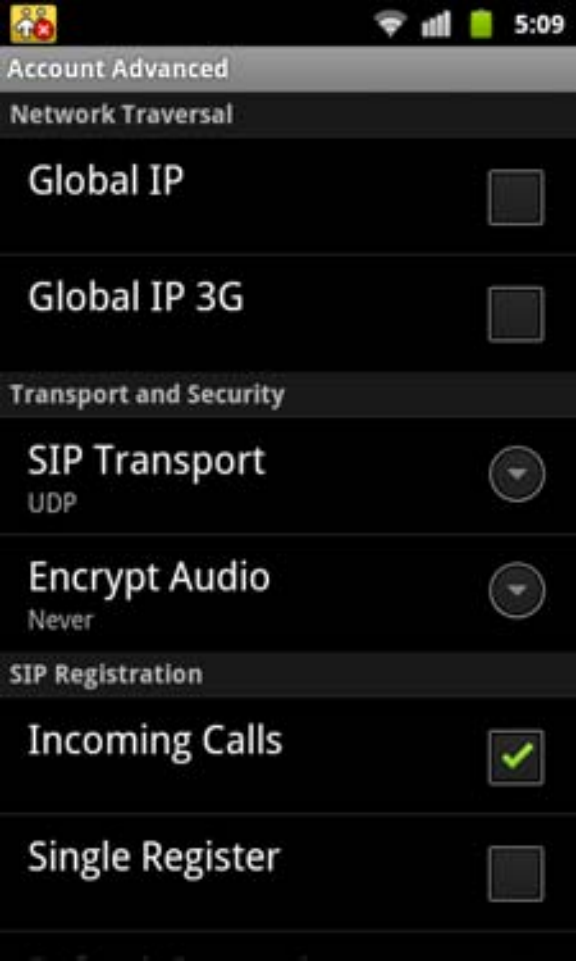
In the Transport and Security section, set SIP Transport to UDP
In the SIP Registration section, tick Incoming Calls
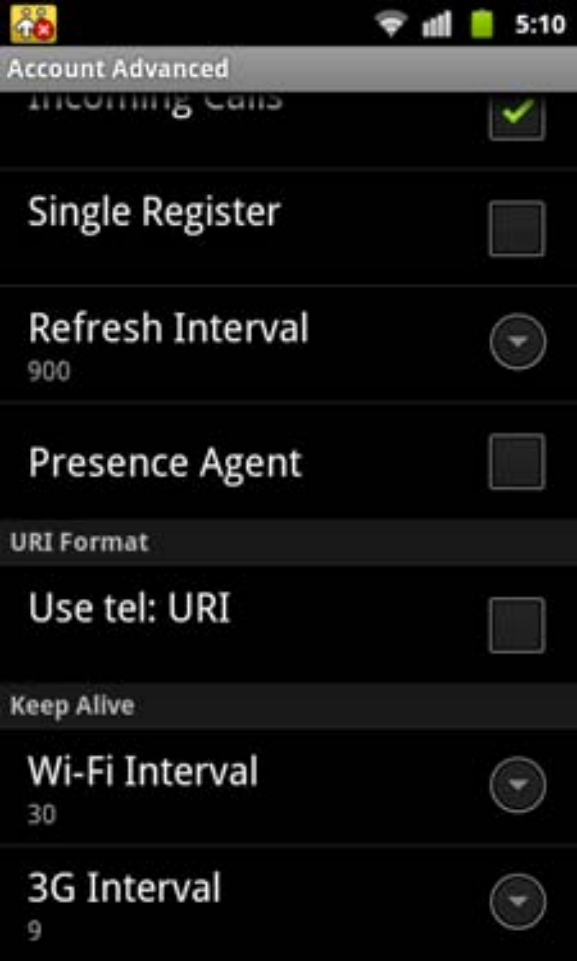
Scroll down to the Keep Alive section, adjust Mobile Interval to 30
In Advanced Settings, scroll down to the Network Traversal Strategy section, and select User Specified
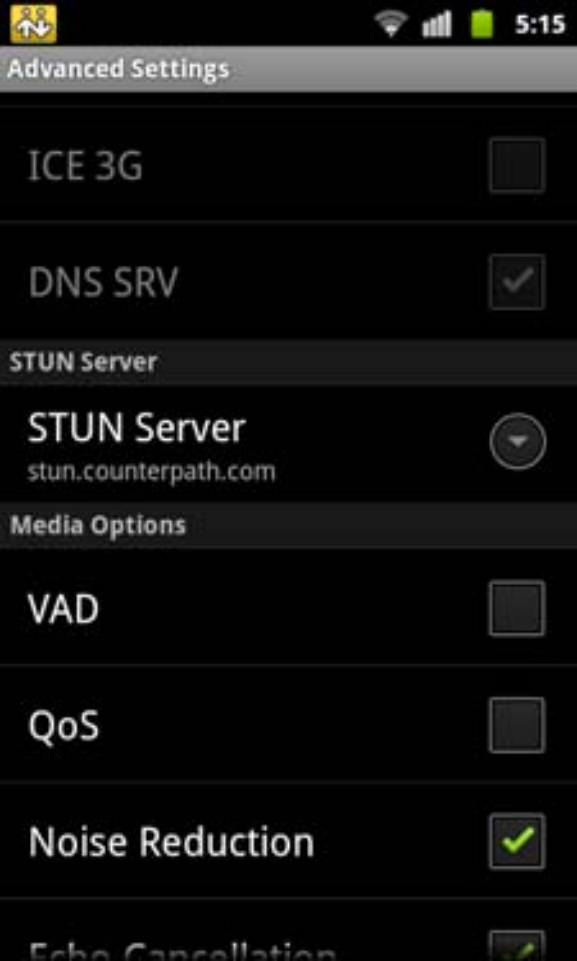
Disable STUN, ICE and DNS SRV, however, ICE may be required depending on your network requirements
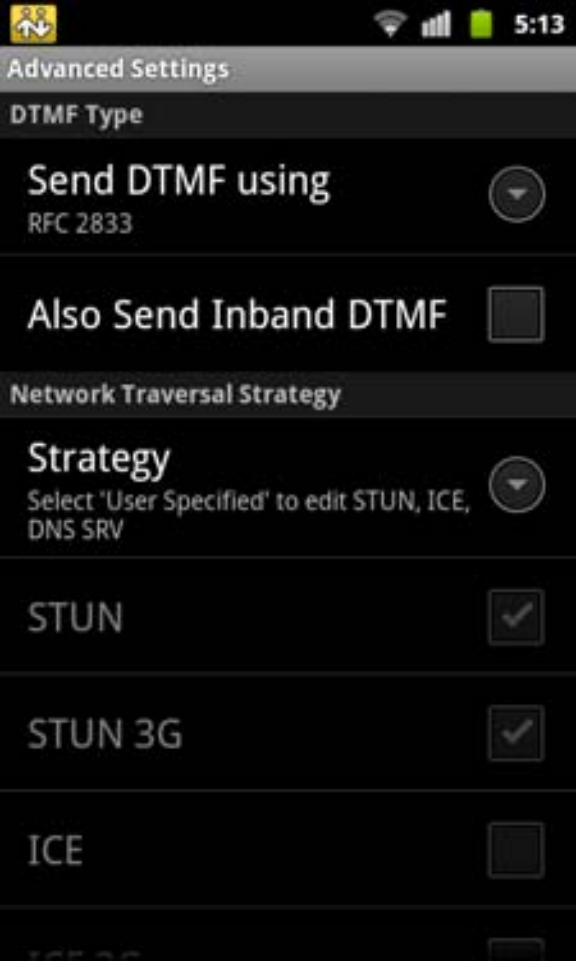
Scroll down to the Media Options section, and tick QoS
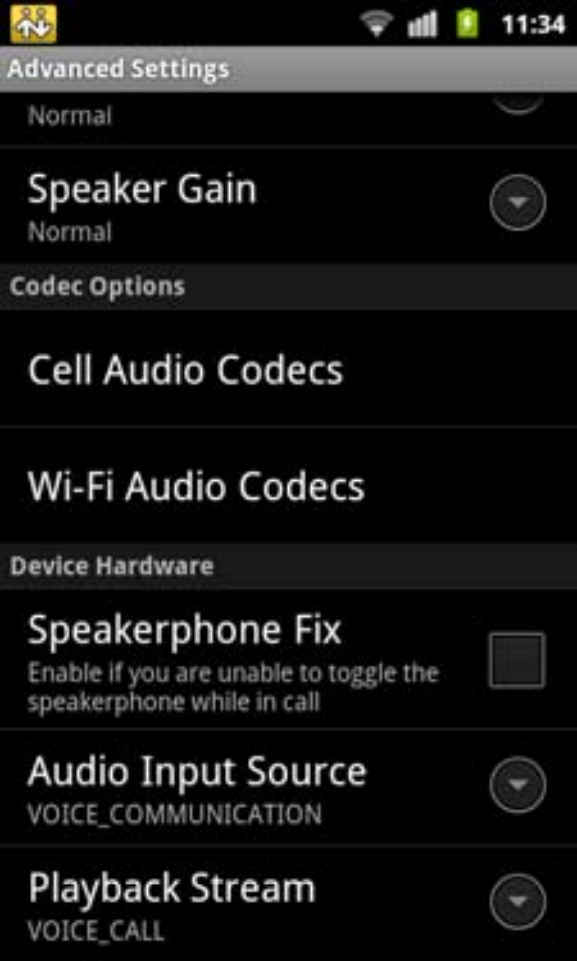
Scroll down to the Codec Options section, and select Cell Audio Codecs
Only enable G729, G711u and G711a
The G729 codec is only available as an in-app purchase. See below.
Ensure that your codecs are set in the following order:
- G729
- G711u
- G711a
Go back and select Wi-Fi Audio Codecs
Only enable G729, G711u and G711a
The G729 codec is only available as an in-app purchase. See below.
Ensure that your codecs are set in the following order:
- G729
- G711u
- G711a
OPTIONAL (but recommended)
The G729 codec is only available as an in-app purchase but is our preferred codec as it uses extremely low bandwidth and maintains excellent call quality.


